Workflow
Workflow
Workflow provides researchers with a one‑stop solution for multi‑omics online task analysis . It meets the needs of fast, batch, and standardized bioinformatics analysis, providing unified storage and high‑performance computing capabilities. Users do not need to worry about underlying resources, enabling bioinformatics researchers to start their analysis conveniently and flexibly.
It supports users in building workflows and submitting tasks in batches. Standard analysis workflows have been supported, including the conversion from spatiotemporal fastq to expression matrix (SAW V5/V6/V7), such as transcriptome, microarray, small chip, and mIF analysis. Single‑cell analysis includes scRNA‑seq, scATAC‑seq analysis workflow, etc. stereopy includes transcriptome cell segmentation, correction, and other workflows.
The workflow analysis module is mainly divided into four modules: workflow management, toolkit management, tool management, and toolkit configuration.
Workflow
Workflow manage workflows created by project members or imported from the public library, and users can use the workflows within the project to analyze data.

Card Markings Explanation
 Indicates workflows published by the official team
 Indicates the source of the workflow which copied from the public library
 Indicates you can run this kind of workflows with input data from upstream tasks
 Gray tags represents custom labels used to help users distinguish workflows.
 Indicates workflows automatically distributed to the project by the platform. Such workflows cannot be deleted, copied, or edited, you can only run and view details of them.
Create workflow
There are two ways to create a new workflow:copy from public and create workflows online
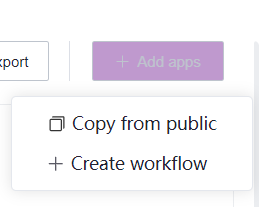
Copy from public
This method can quickly copy public workflows into the project,which is more suitable for analysts without code compilation.
- Click the "Copy from Public " button, select the workflow to be copied, click the "Copy" button on the workflow card, and then add it to the project after confirming.
Create workflow
This method is mainly suitable for the developers .
The overall steps for creating workflow include: building (or selecting) a docker image, writing workflow code , and preparing a WDL dependency task (optional).
Building a docker image
Workflow task runs in the docker, so the docker parameter must be included in the WDL, please prepare the image in the ”STOmics platform“ in advance. You can build images directly on the platform, or ues platform image derivation, or import external image .Please refer to the Image chapter for specific operations.
- After the image is successfully created, click the image card to view the URL of the image

- Click the copy button next to the url
 and paste the url into the docker_url parameter. In this way, you can specify the image of workflow running
Prepare WDL
- Click “Workflow”to enter the workflow management page, click [Create workflow]

- Fill in the workflow name, version, description, workflow label and Settings.

Instructions
● The workflow name cannot be the same name within the project
● The Workflow version platform defaults to three digits, such as 1.2.3
● The workflow label is a custom label, which is convenient for users to quickly know the workflow information through the tag
● Public WDL in the project means users can view the WDL code. If this configuration is not selected, the WDL code cannot be viewed
- Enter the workflow editing page, you can edite WDL online or import offline task file to platform

After editing the wdl, click the "Save" button to save the workflow. At this time, the platform will verify WDL according to the official WDL specifications. The verified wdl appears in the workflow list
You can click [Run] button to debug the workflow,please refer to the "Run workflow" chapter for specific operations

Considerations
● Do not specify BGI‑cluster paths in WDL, as the system account may not have permission to access those paths. Unauthorized paths can cause task failures. It is recommended to upload the required files to data management and define them as input parameters in WDL. Additionally, consider that the cloud platform is deployed in different centers such as AWS, Aliyun, Chongqing, Qingdao, and Hangzhou, so cluster paths may become invalid.
● For certain WDL dependencies, they can be packaged in the image.
● The current version only displays input parameters defined in WDL as runtime parameters. Intermediate task parameters are not displayed, so make sure to define necessary parameters in the input code block when editing WDL code.
● Only output parameters defined in WDL will be displayed in the "Data" after the workflow finishes running. Therefore, any necessary output result files should be defined in the workflow's "output", as the output of intermediate tasks is not supported.
● Make sure WDL includes the "input" code block, as its absence can cause task failures.
● Note the parameter changes in WDL: "docker" to "docker_url", "cpus" to "req_cpu", and "memorys" to "req_memory".
Run analysis
Project members use the workflow for data analysis. The analysis procedure includes data preparation, data selection, task parameter configuration, output configuration, job submission, and task result viewing. The workflow supports two modes of job submission: running with file paths and running with table model.

Run with file paths
Running with input defined by file paths is mainly suitable for single task submission:
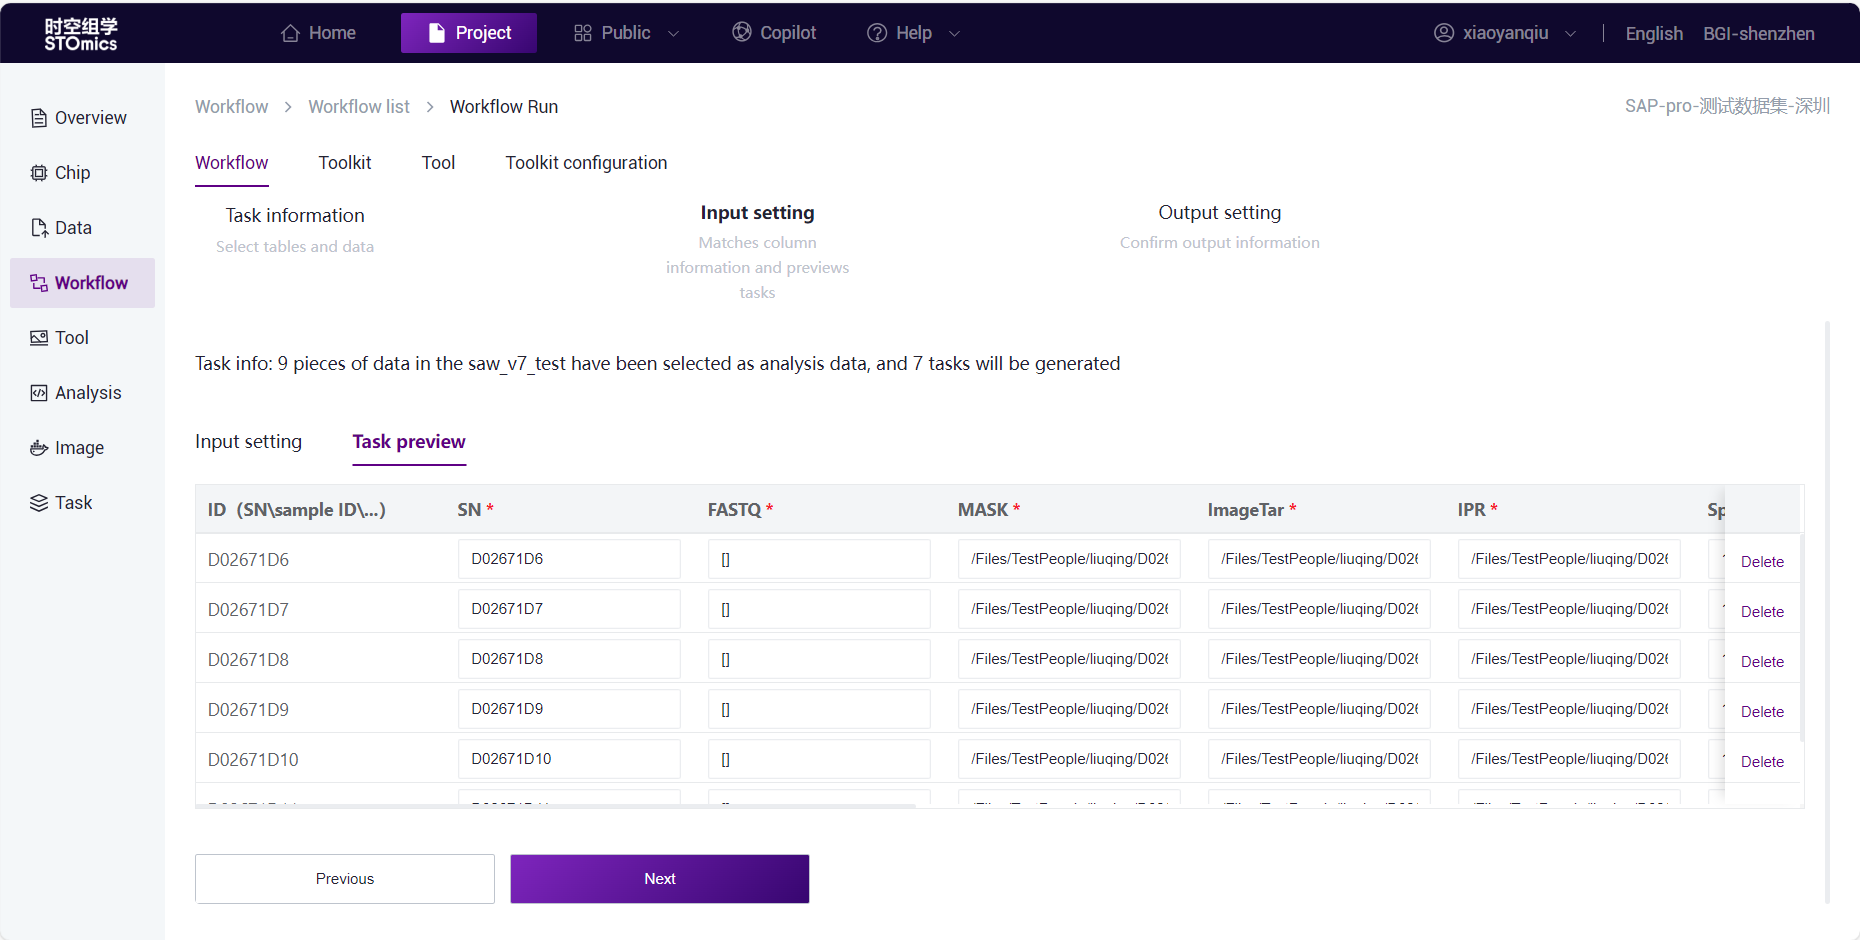
Choose the "Run workflow with inputs defined by file paths" way, then click "Next" to enter the input settings page. Please fill in the parameter values of WDL in the input.
When there are too many parameters in the workflow, parameters can be selected through the "Display all parameters" dropdown box, which includes options to display "Display required parameters", "Display all parameters", and "Display parameters with no default values first".

- Input values in the value box or select file input from the data management. Click the "professional" button to fill in the parameters using JSON code.

Parameter type explanation
Cloud platform supports File (file, directory), String, Int, Bool, as well as corresponding array and two‑dimensional array types.
Run with table model
When needing to submit tasks in batch, you should submit through the table, and you click on "Run workflow(s) with input defined by table". The following is how it works:
Data Preparation
Users can upload the data files required for analysis through the “Data” module. If batch analysis is needed, users can prepare batch submission data information through the “Table” module (please refer to "Add table"chapter for specific operation).

Data Selection
After selecting the required workflow and clicking "Run", choose the prepared table data. In the table, data with the same ID in the first column correspond to a task. After checking the data, click "Next".

Input Settings
- In the second step "Input Settings", you need to match parameters by selecting table headers. The system then batch processes that column's values as parameters for task execution.
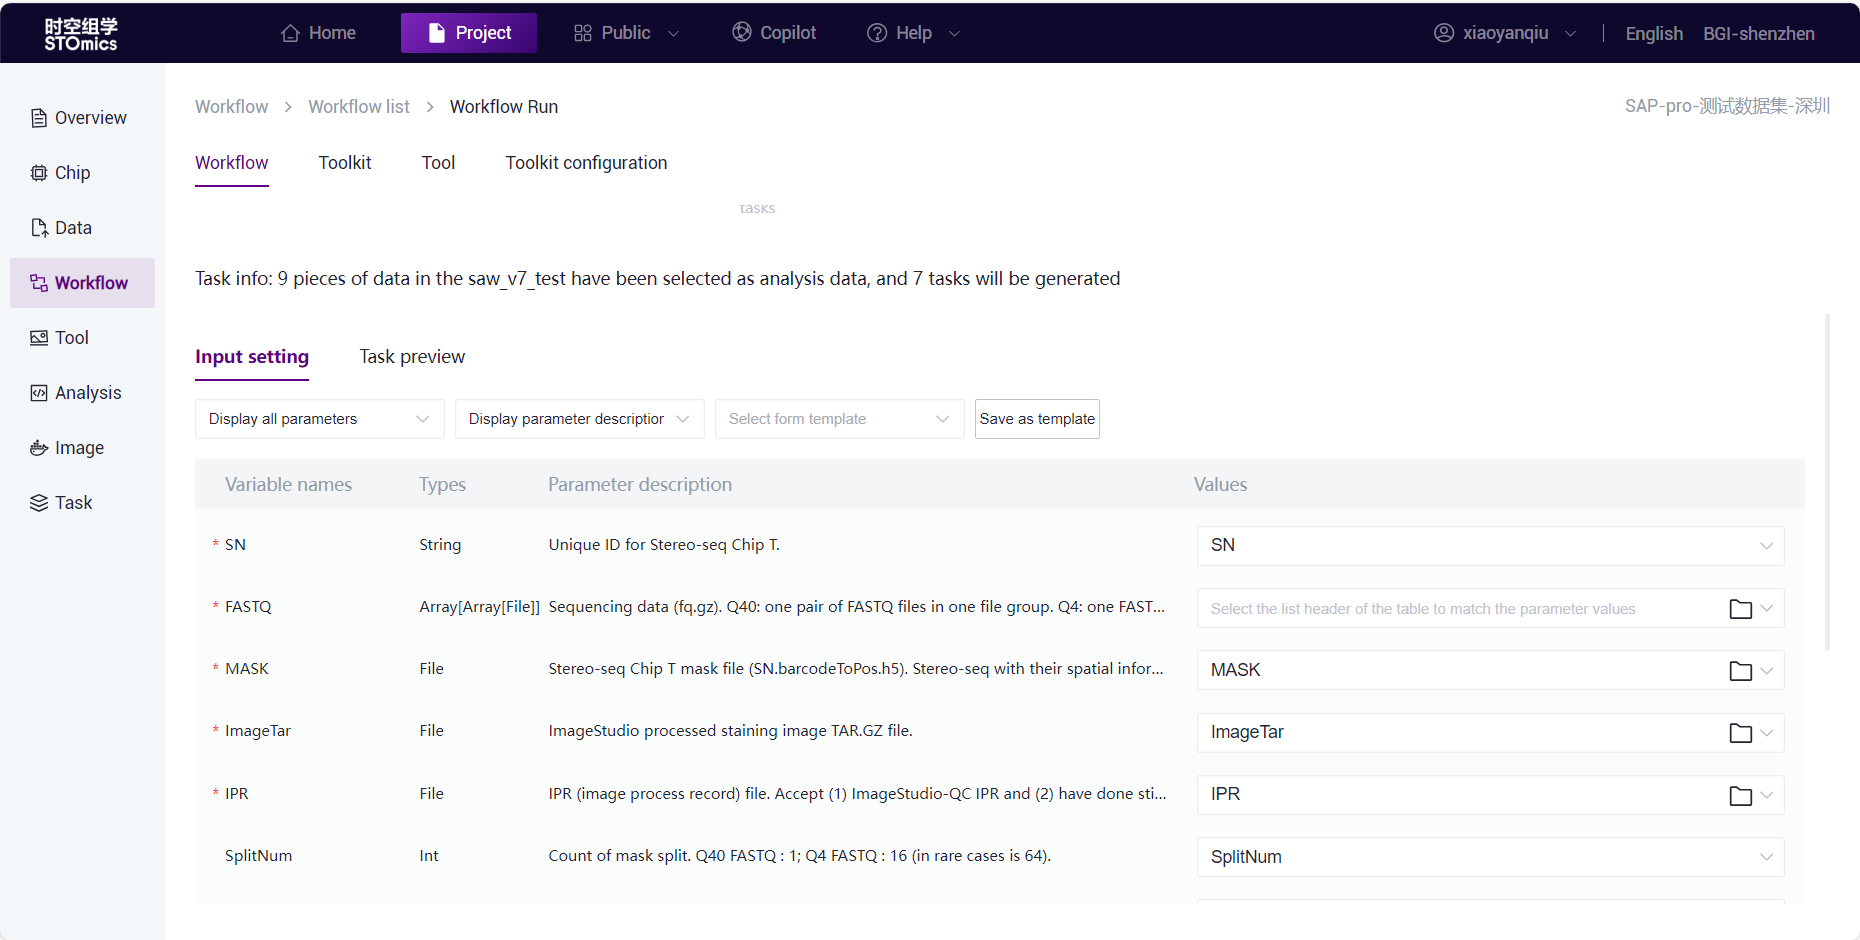
- Click the value dropdown box to display the selected table headers and match the parameters one by one.
If it's the first run and after matching parameters, click "Save as template".
 For subsequent runs of the workflow, choose the table and then select the saved template, which will automatically match the table headers and parameters.
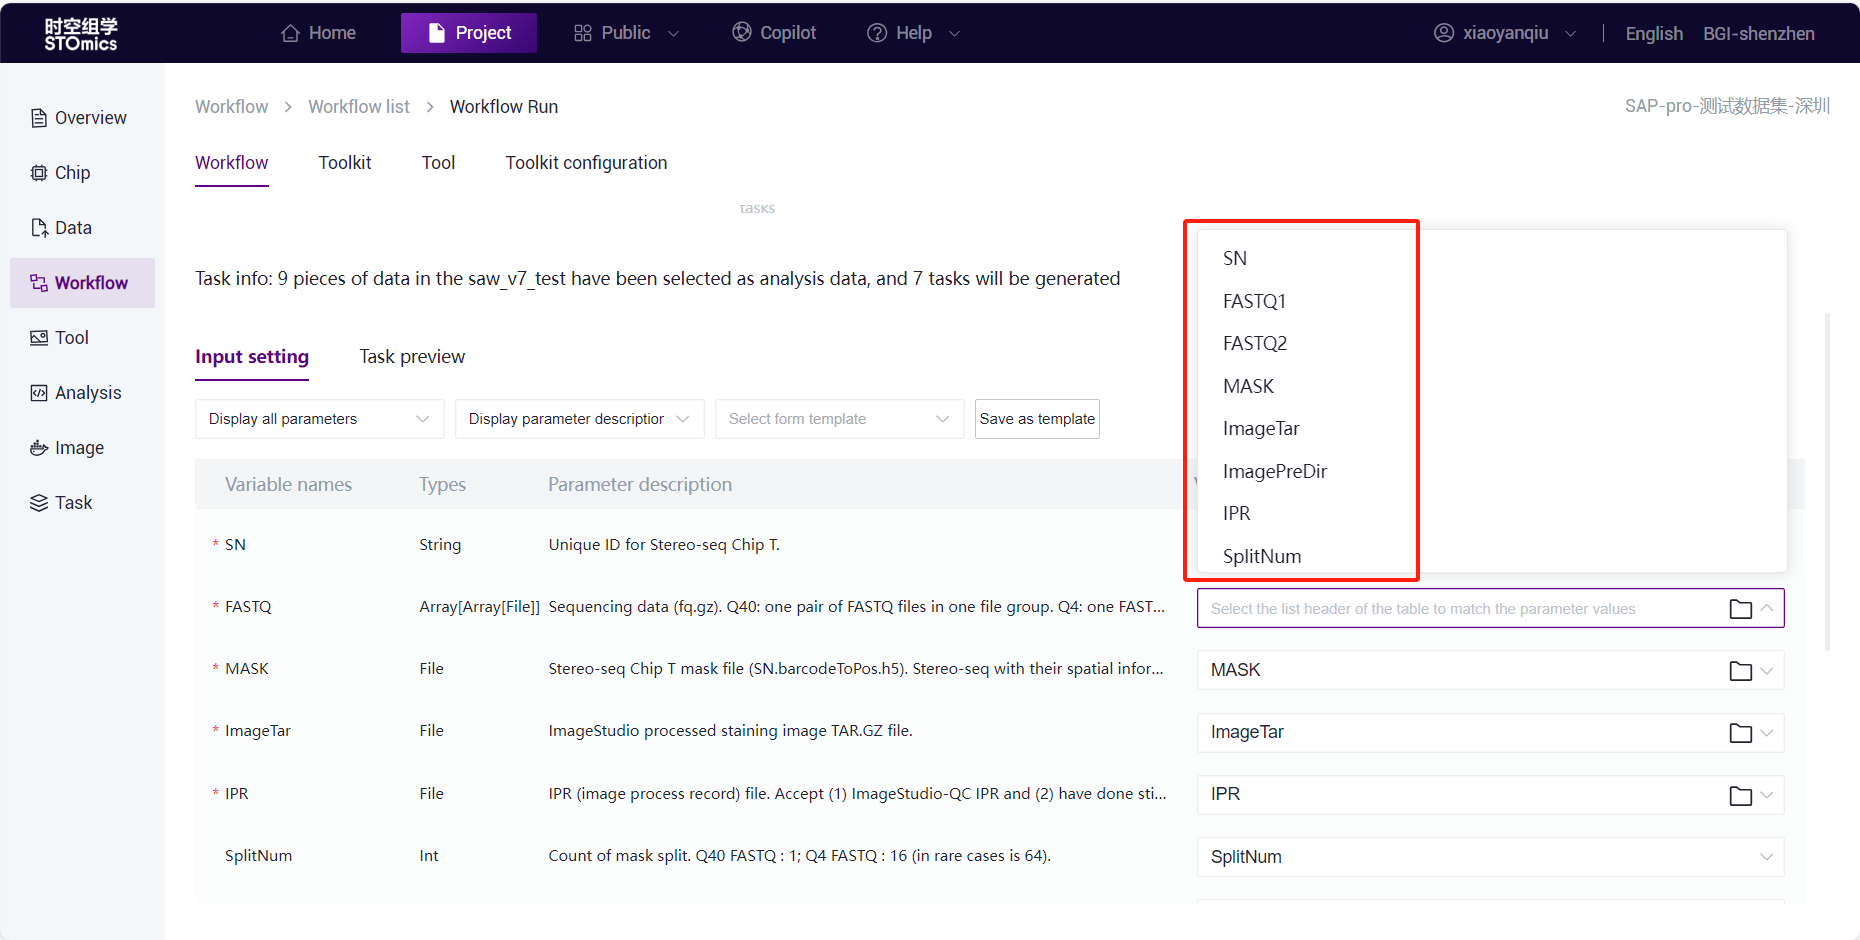
After setting the parameters, click on the task preview, confirm the data and parameters to be analyzed. In the task preview, you can click the value box to modify parameter values.
Note
When using the "STOmics chip data" to submit SAW-ST-V7 and SAW-ST-V6, in the"Task preview" interface:
Click on the "FASTQ" parameter value box to display the "Sequencing data" and select FQ by checking the table.

IF run SAW-ST-V6,click on the "ImageTar" or "IPR" parameter value box to display the "Image data", and select image by checking this table. TAR and IPR files should be used in pairs, so when selecting image data, TAR and IPR will be selected together, and the TAR and IPR data in the same row will be assigned to the parameters.
TheSAW-ST- V7 requires more than 3.0 image data, but“Image data" table only syncs image data below 3.0,you should select iamge file from "Data management"
Output Settings
When submitting a task, in the third step set "Output Settings":
- Click on "Modify the output directory" to customize the directory and filename for the result files . The default result directory for task output is ”/Files/resultdata/workflow“, and it is named after "TaskID" by default.


Step 1 allows you to modify the directory. Selecting a hierarchy means creating the result folder below that hierarchy.
Step 2 determines the name of the result folder. After modification, click "Confirm". After the task analysis is completed, the result folder will be saved according to the user's custom name and directory.
If the user does not choose to modify the directory name, the folder will still be named after the TaskID.
Note
Folder names must not be duplicated within the same hierarchy.
Only English letters, numbers, "-", "_", and "." are supported.
Task remarks allow input of up to 200 characters.
When generating batch tasks, the remarks correspond to each task in the batch.
- Task remarks allow customization of task information.
Task remarks allow input of up to 200 characters.
When generating batch tasks, the remarks correspond to each task in the batch.
Task Submission
After setting the data and tasks, click run, and the task will be submitted to the analysis queue for processing.
Task Viewing
- After the task submission is completed, you can view the task status and results in the "Task".

- When the task analysis is completed and the task status is complete, click the task details button to view the task's input and output.

- To view the output files, click on the file name under the "Output" column, and you can jump to data management to view specific files.

- Clearing the file name search field will display all the output files for that task.

Review a Workflow
If you want to view specific workflow information, you can enter the workflow details interface. From there, you can edit, run, copy, publish, and delete workflows.

Edite a Workflow
- Click on the edit button on the details page or workflow card to enter the workflow editing page, which consists of detail information editing and WDL editing page, showing only the content needed for editing.

In edit mode, you can edit the name, version, tags, settings, description (markdown), and inputs (parameter descriptions).
Click on the "WDL info" button to enter WDL edit mode, referring to historical editing features.
Click the save button to save your edited detail information.
Exporte and Importe Workflows
When batch migration of workflows/tools is necessary, the export option can be used. Entering the workflow/tool management interface, you'll see the "Export" button.

Select the workflows you want to export, allowing multiple selections, and click the "Export" button. The exported workflows will include all versions of the selected workflows. The batch exported workflows will be in one compressed package, with the directory structure as follows:
wf1 (each workflow is a folder, named: workflow_name)
wf1_v1 (each version is a folder, named: workflow_name_version_number)
wf1_v1.info (the basic information for that version, unique, including workflow name, version, version description, WDL main file, list of dependency files)
wf1_v1.wdl (the main WDL file, unique)
wf1_v1_dependency.zip (the dependency files for that version, up to 1 supported)
wf1_v2
wf1_v2.info
wf1_v2.wdl
wf1_v2_dependency.zip
wf2
- When importing workflows into a project, click the "Import" button, select the compressed file from the local directory to import. The directory structure of the imported compressed package must be consistent with the exported structure. If there are workflows with the same name, the system will automatically rename them by adding a number suffix to the original name.
When importing a workflow into a project, click the "Import" button and choose a file compression package from your local device. The directory structure of the imported package should match the exported structure. If duplicate workflow names are detected during the importing workflows, the user needs to choose how to handle the duplicates:

Replace the target workflow: The imported file will overwrite the existing workflow in the project, while preserving the original associations.
Skip and make a copy: A new workflow will be added with a numerical suffix automatically appended to the workflow name.
Let me decide on each workflow: After selecting this option, you can choose to specify which workflow to replace.

Note
You cannot replace the prefabricated workflows, workflows configured in toolkits, and workflows without editing permissions.
Before importing tools and workflows, the images must be migrated to the respective environment.
Publish (or Unpublish) Workflows
- Workflows that have been created can be published to the public library. Click on the "Publish" button, and the workflow published to the public library will then be displayed in the library, automatically publishing all workflow versions.

After clicking the publish button, the operation list adds a new "Unpublish" button.
Click the unpublish button, the operation button returns to the initial name "Publish."
Update Workflows:
Workflows copied from the public library that haven't been edited can still receive updates from the public library. After updates in the public library, a "Update" button appears in the workflow card
To update a single workflow, simply click the "Update" button on the card.
To update workflows in bulk, click the "Update" button in the upper right corner, which will display the number of workflows that need to be updated.

Clicking the "Update all" button to update all of them.
After the update, the current workflow will be replaced with the latest version of the source workflow.